Table of Contents
Visual supports can be an excellent tool for children with autism, helping them understand and navigate their world. Here’s a simple guide on how to create your own wooden visual supports.
What are visual supports for children with autism?
Visual supports are visual cues that help children with autism understand and follow instructions, stay organized, and even manage their own emotions. They come in many forms: pictures, words, symbols, diagrams, charts – anything that helps the child communicate or make sense of their environment.
How do visual supports help children with autism?
Visual supports give children with autism an easy way to access information, structure their day, and understand expectations. They can also help reduce stress levels by providing a visual aid for the child to rely on during challenging situations. Visual supports are especially helpful in reducing anxiety when transitioning between activities or locations.
Children with autism have a difficult time processing verbal instructions and can become easily overwhelmed in a variety of situations. Visual supports help to break down instructions into manageable chunks, provide consistency, and foster independence.
DIY wooden visual supports
Making your own wooden visual supports is simple if you have the tools and materials available. First, decide what type of support you’d like to make. Some options include a simple pegboard, picture frames, or even 3D objects.
Once you’ve decided on the type of support you want to create, gather your materials and tools.

How to make Wooden visual supports
Materials Needed
- Wooden board or wooden shapes (circles, squares, etc.)
- Acrylic paints and brushes
- Sandpaper (optional)
- Clear sealant (optional)
- Permanent markers
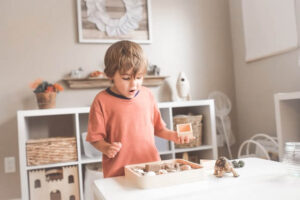
- Images representing different actions, emotions, or objects
- Glue or Mod Podge
- Laminator and laminating sheets (optional)
Step 1: Choose Your Visuals
Start by deciding what kind of visual support you want to create. These could include emotion cards, task steps, communication boards, or visual timers. It’s best to choose visuals that will most benefit your child’s specific needs.
Step 2: Prepare the Wood
If you’re using a wooden board, consider sanding it down to ensure a smooth surface. If you’re using wooden shapes, these are usually ready to use. You can paint the wood in bright, appealing colors using acrylic paint. Allow the paint to dry thoroughly.
Step 3: Attach the Images
Find or create images that represent each visual aid you have decided on. For example, if you’re creating emotion cards, you might have pictures of faces showing different emotions. Print and cut out these images and glue them onto the wooden shapes or board. Consider using a laminator to protect the images before attaching them.

Step 4: Add Text
Use permanent markers to write any necessary text onto the wooden shapes or board. For example, you might write “happy,” “sad,” “angry,” etc. on emotion cards.
Step 5: Seal the Visual Supports
To protect your visual supports and make them last longer, consider applying a clear sealant over the top. This step is optional but can give your supports a nice finished look and feel.
Step 6: Introduce the Visual Supports
Once your visual supports are complete, introduce them to your child. Explain what they represent and how they should be used.
Tips:
- Make sure the images are simple and easy to understand.
- Try to use real photos whenever possible for a more realistic representation.
- Involve your child in the creation process. This can help them feel more connected to the visual supports.
- Be consistent in using the visual supports. The more they are used, the more effective they will be.
Creating your own DIY wooden visual supports for your children with autism can be a fun and rewarding project. Not only does it provide a helpful tool for your child, but it also offers an opportunity to spend quality time together, engaging in a creative activity.
- Autism Routine Disruption in Adults: Coping Tips - July 16, 2024
- Autism and Obsession: An Overview - July 16, 2024
- Autism and Taking Clothes Off: Management Tips - July 16, 2024